
How to Display a Sewing Work
An important decision that every Montessorian ponders is how to display the work appropriately. How do I make the display complement the work? Is it inviting, clean, and complete? These questions are crucial to how the child responds to the new work. Below are some guiding points to consider when displaying your new sewing work.
Put yourself in the child’s perspective
Sewing, like to all other works in the classroom, is best thought of when you put yourself into the perspective of a child completing the work. Take out the work, and imagine what you would need to be successful. Are all of the tools there? If you have never seen the tools before, could you figure out what they were used for? If not, how can you display them in a way that guides the child to the correct answer? Answering these questions will guide you in creating a unique system that is best suitable to your classroom and the needs of your children.
Use natural trays
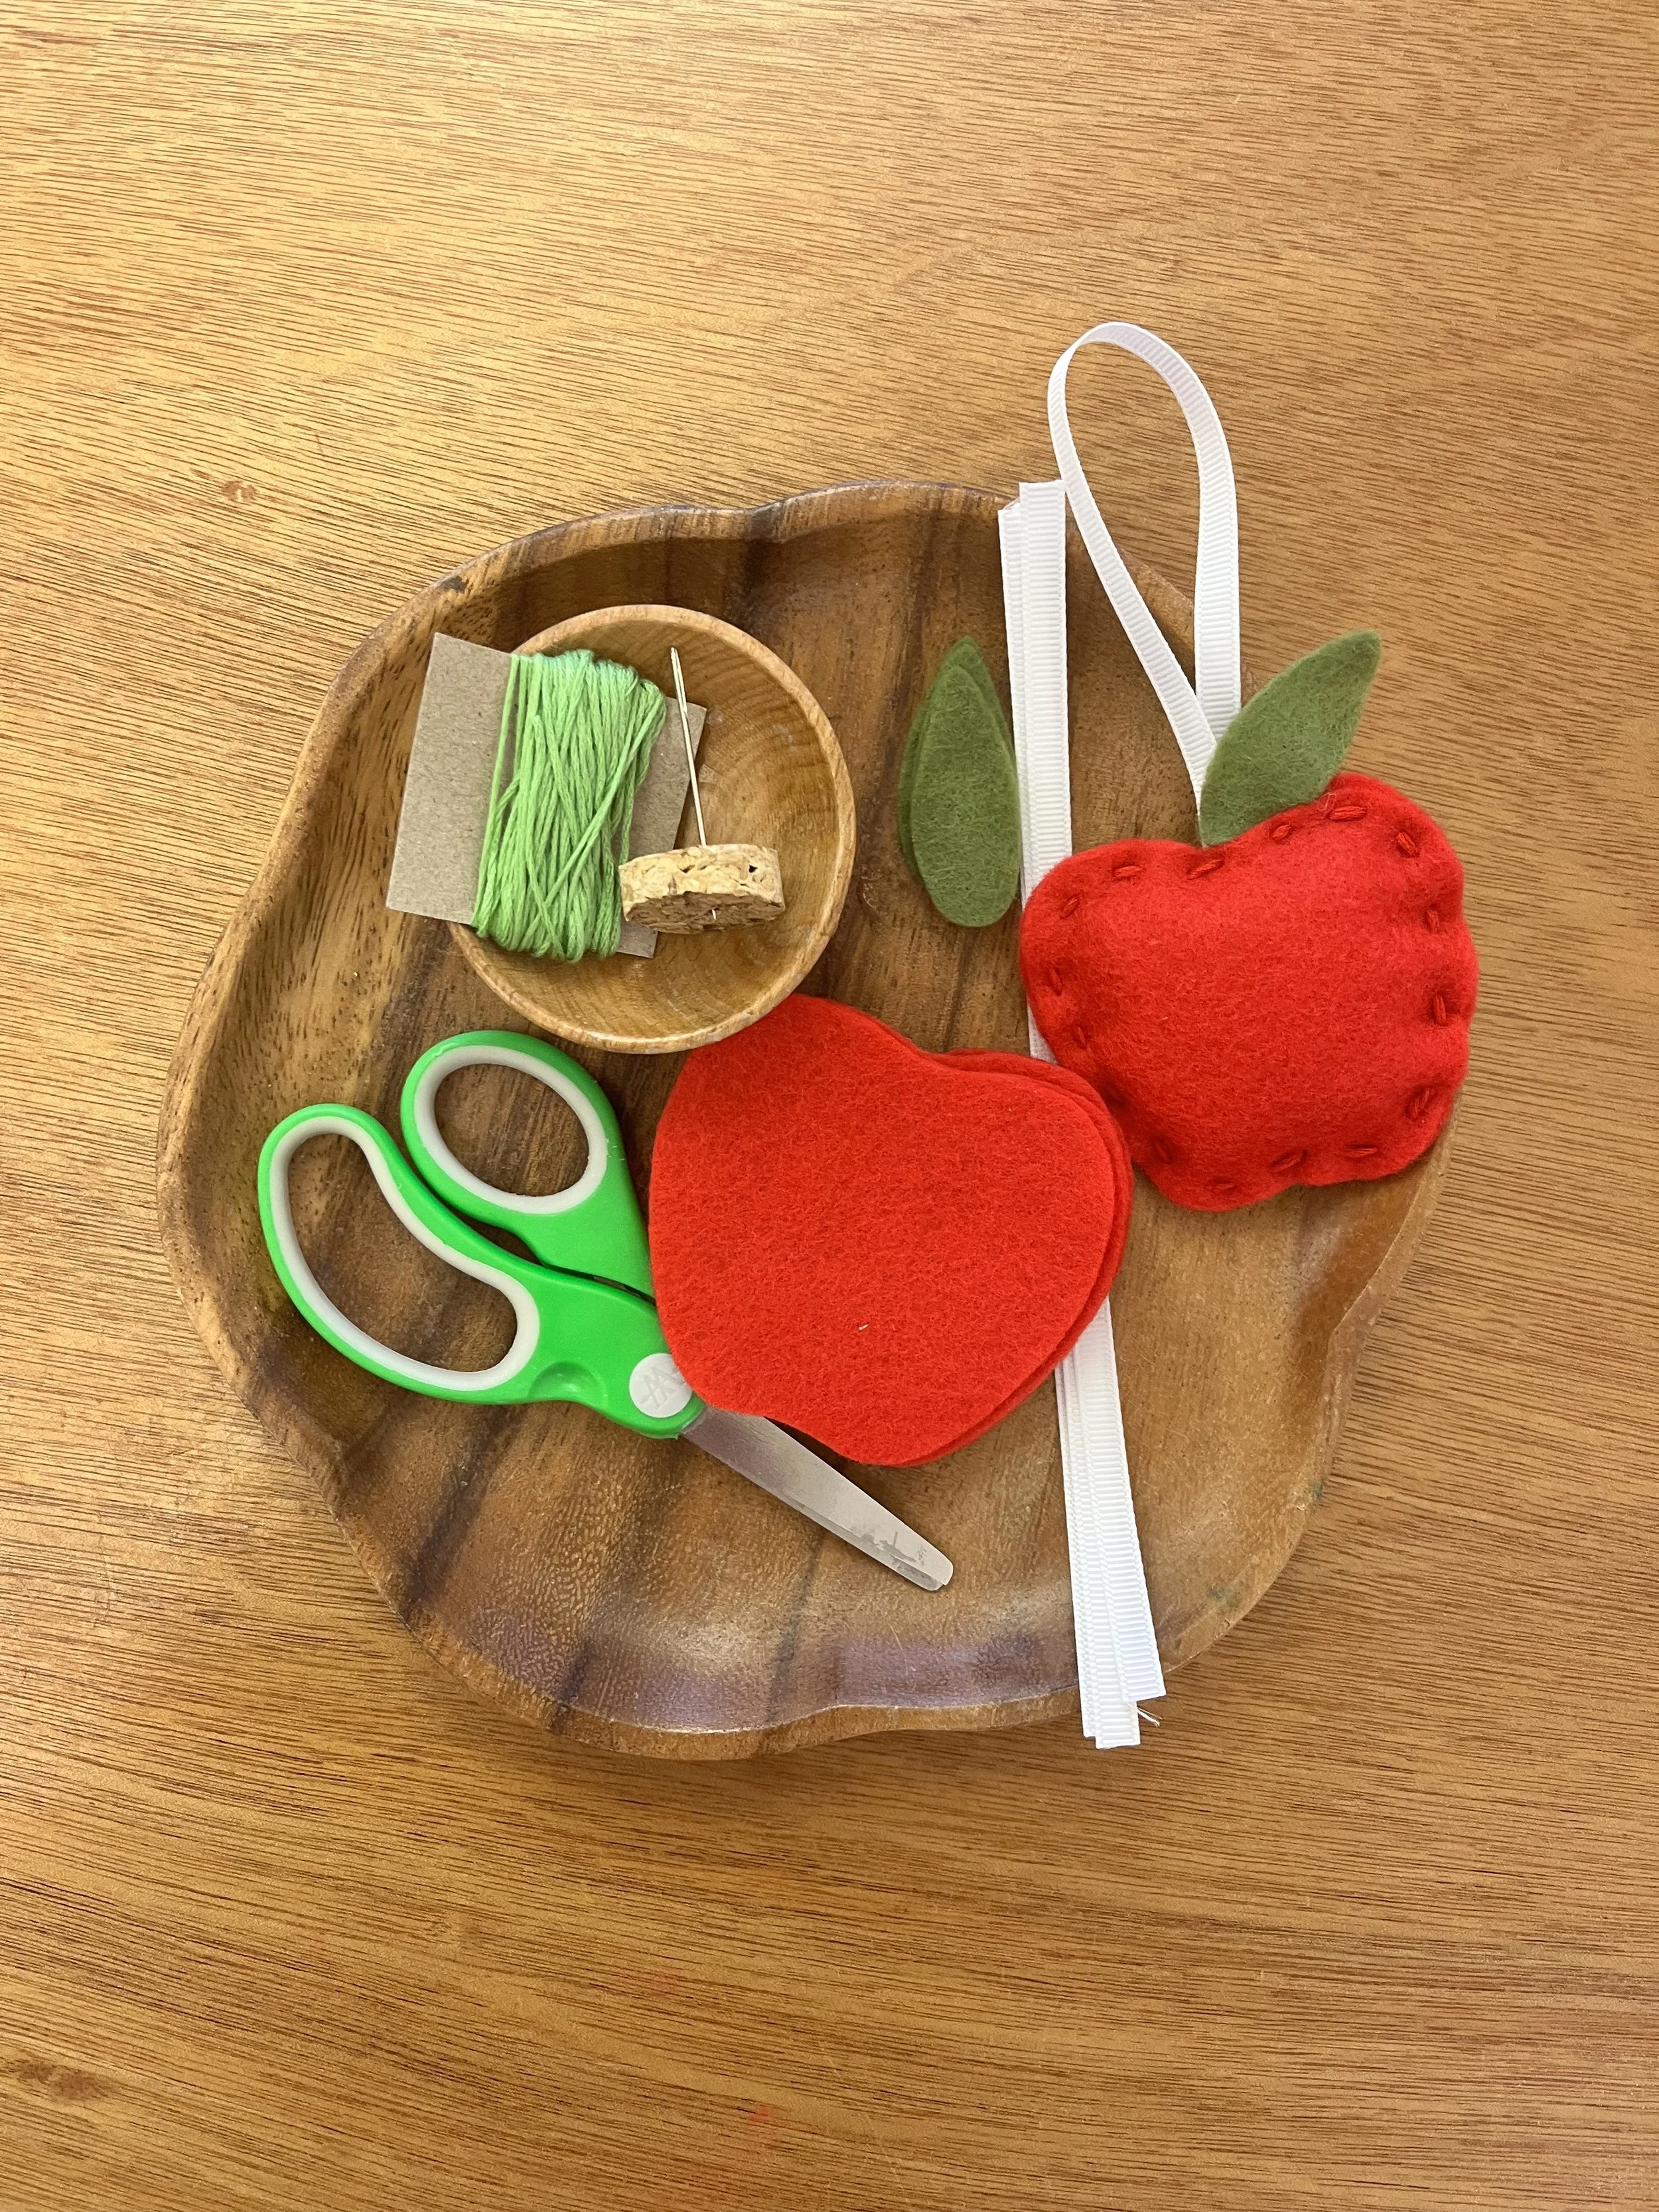
The sewing works will most likely be full of vibrant colors, so you want to get a tray that calms the potentially overwhelming feel and brings the materials all together. By having trays made with natural wood and neutral colors, you allow the child to focus on the sewing work and tools, instead of navigating around any loud designs on the tray. On top of the larger tray, try using smaller, natural trays to help divide the work.
Tools (sewing needle, thread, and threader) and accessories (stuffing, eyes/buttons) are best in a smaller container on the tray, with the fabric and scissors directly on the tray. This helps the child stay organized and guides them on how each item is used in relation to each other.
Make available the appropriate tools
As you are aware, the prepared classroom is one of the three leading characters in the classroom, and is crucial to the success of the child. In equipping the child with the right tools, you are giving them the opportunity to complete the work independently. In addition to simply the fabric needed, here are tools I recommend being available to the child:
Sewing needle and cork
A sharp, strong sewing needle is vital to how easily the child can sew. I find embroidery needles to be the best middle ground for all the important components needed with the sewing kits. They have a large eye which is large enough for embroidery floss to thread through. The ends are sharp enough to pierce between the fibers the fabric, but it is not a blade (such as upholstery or leather needles) which are designed to cut through the fabric.
I find that small pieces of cork are perfect for securing your needle when not in use. The cork is also durable and a single piece can be used repeatedly for a long time. It is also a natural, more sustainable option than plastic options on the market.
With the use of any sharp object in the classroom (needles, scissors, perforating tool), it is important to emphasis safety and give a lesson about how to use each item appropriately.
Embroidery floss
Embroidery floss is the strongest and easiest to maneuver thread option. Typically they are constructed with 6 thin strands, tightly twisted together to create a strong bond. To prepare the floss, you want to wind the floss onto a bobbin. One skein of embroidery floss typically fits over 4 bobbins. If there is too much thread on the bobbin and child drops the bobbin, they potentially will have to rewind the whole skein, creating a lot of extra work for them to do. As a control of error, I like to minimize the amount of extra work by dividing up the skein into smaller bobbins.
Sustainability tip: Use recycled cardboard to create your own bobbin. Cut out a small rectangle, about 2”x"2”, and cut a small slit in the side.
Scissors
Sharp enough scissors are very important to allow the child to cut the thread by themselves. Make sure they are child-appropriate and the child is given a lesson before using them.
Put out limited supply
As you prepare the classroom for the day ahead, refill and refresh the trays to only supply enough product for 2-3 completed items. Certainly refill it during the work cycle if the students are interested and have used it all, but by limiting the availability, you are helping the child to stay more organized and give them greater focus on their own work.